Printing to Film Using DICOM Printer 2
This is the first in a series of guides explaining how to use DICOM Printer 2. While it's a powerful and complex tool, some of its most popular applications are quite straightforward. This guide focuses on one of the most common use cases: printing to film.
Goal
To print true-size images of dental X-rays, with a facility logo in the corner of the film.
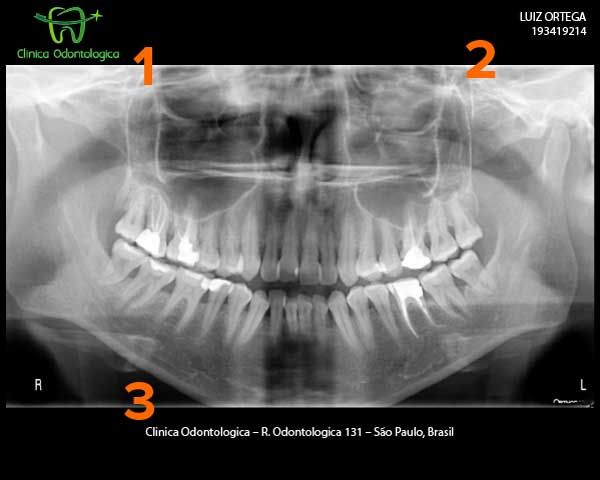
We're looking to create output like this:

Note that:
- There is a logo at the top left
- Patient information is displayed at the top right
- Clinic information appears at the bottom
This tutorial will walk you through the basic steps required to output the image. We'll cover adding logos and patient demographics in the next article in this series.
Details
Source application: Dental imaging software such as DBSWIN or SIDEXIS Destination: AGFA Drystar 5302 (or any other DICOM Print SCP device)
Setup Process
Step 1: Install DICOM Printer 2
First, download and install DICOM Printer 2 from our downloads. The installation process is straightforward:
- Run the installer and follow the on-screen instructions
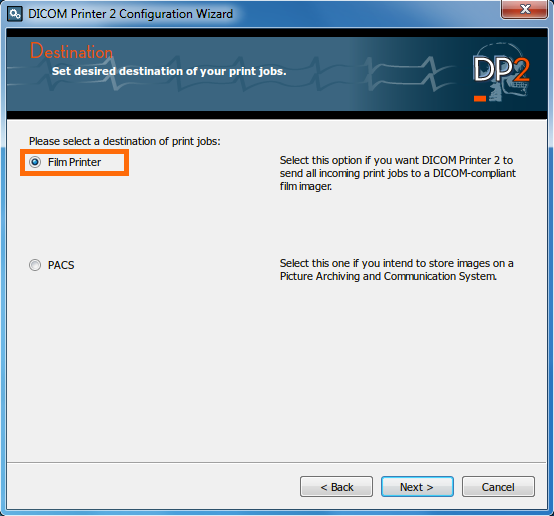
- When prompted, enter your DICOM Print SCP device details:
- IP Address
- AE Title
- Port (usually 104)
Step 2: Configure Print Settings
After installation, you'll need to configure the print settings:

- Open the DICOM Printer 2 configuration utility
- Navigate to the Print Settings tab
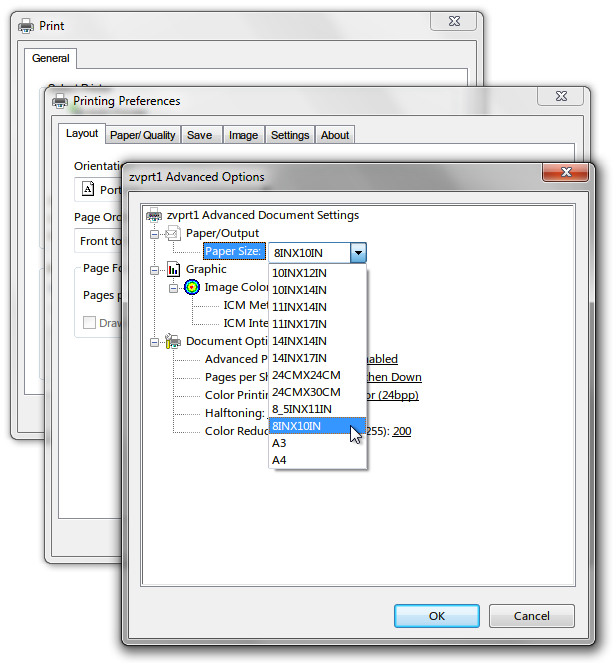
- Select the appropriate film size for your printer (e.g., 8×10, 11×14)
- Set the image layout and orientation based on your requirements
Always ensure you select the correct film size in the print dialog. Using the wrong size can result in distorted images or wasted film.
Step 3: Print Your First Document
You're now ready to print:

- Launch your dental imaging application
- Open the X-ray image you want to print
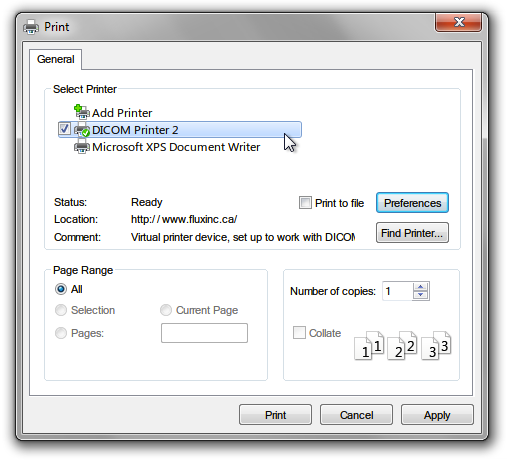
- Select Print from your application's menu
- In the print dialog, select DICOM Printer 2 as your printer
- Choose the appropriate film size

- Click Print
Need to add your logo and clinic information?
Continue to our next guide on adding logos and facility information to customize your film output.
Continue to Part 2: Adding a Logo
Troubleshooting
If you encounter an "Association Request Failed" error, this typically indicates that your connection parameters are incorrect or your film printer is offline. Verify that:
- The IP Address is correct
- The AE Titles match exactly (they are case-sensitive)
- The port number is correct (usually 104)
- The film printer is powered on and connected to the network
If you continue to experience issues, please contact our support team for assistance.